LightBlog

lundi 27 décembre 2021

Xiaomi 12 design, features and specifications leaked ahead of the official launch

Xiaomi is all set to unveil its next flagship lineup, Xiaomi 12, tomorrow. We already know the new series will be powered by Qualcomm’s latest flagship SoC, Snapdragon 8 Gen 1, and come running MIUI 13, the latest version of Xiaomi’s custom skin. Now ahead of the official reveal, a series of leaks have spilled the beans on the specifications and design of the Xiaomi 12 lineup.

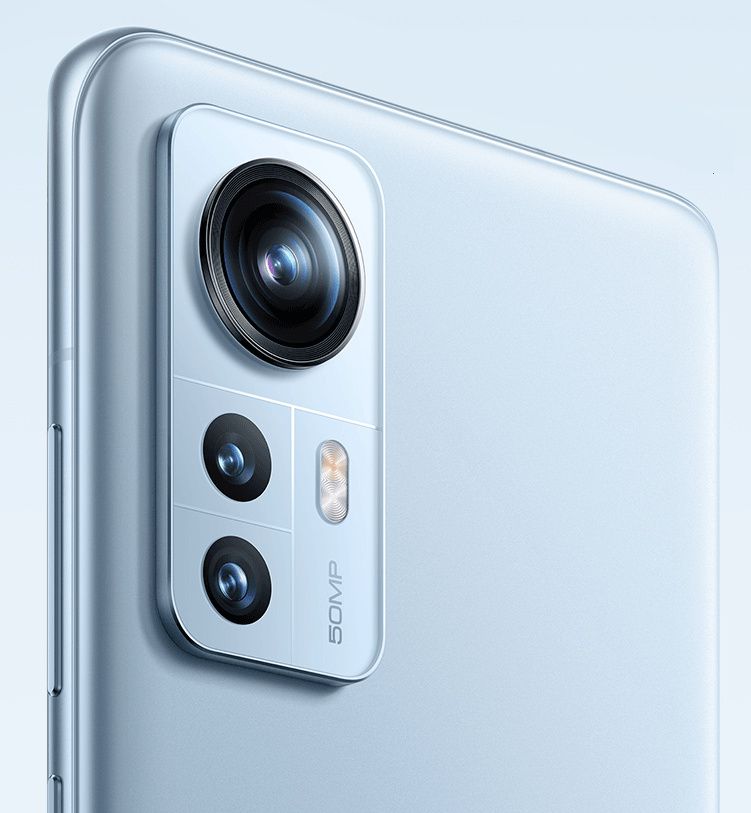
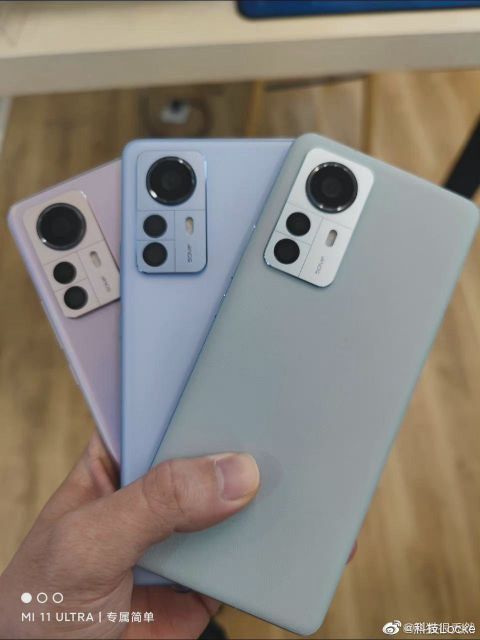
Prolific tipster Evan Blass AKA @evleaks has leaked official renders of the Xiaomi 12. While Xiaomi did share a teaser of the Xiaomi 12 last week, it only showed the front of the phone. The renders shared by evleaks give us our best look at the Xiaomi 12’s design yet. As can be seen in the images attached below, the Xiaomi 12 features a rectangular camera module on the back housing three cameras, and an LED flash. We can also see the Xiaomi logo at the bottom perpendicular to the camera bump.

Xiaomi 12 shown in gree colorway Xiaomi 12 being held in hand A close up of the Xiaomi 12's camera module

Blass has also posted a short promotional video of the Xiaomi 12 showcasing the phon’s overall design and four colors in action.

Meanwhile, a separate leak from a Weibo user (via @_snoopytech_) detailed the design and key specifications of the Xiaomi 12 Pro. As we can see in renders, the Xiaomi 12 Pro sports an identical design to the regular model, featuring the same rectangular camera module and a hole-punch display on the front.

A render of Xiaomi 12 Pro in green colorway XIaomi 12 Pro render in pink colorway Xiaomi 12 render (blue colorway) Xiaomi 12 Pro in black colorway

The Weibo leak also reveals some of the key specifications of the phone. As per the leak, the Xiaomi 12 Pro will feature a bigger 6.73-inch QHD+ AMOLED display with a 120Hz display refresh rate and Dolby Vision support. The phone’s triple camera setup will reportedly consist of a 50MP main camera, a 50MP ultra-wide camera, and a 50MP telephoto lens with 2x optical zoom. Over on the front, the phone will feature a 32MP selfie camera. The camera bit matches previous leaks which also said the Pro model would feature three 50MP cameras on the back.

Elsewhere, the Xiaomi 12 Pro is said to pack a 4,600mAh battery with 120W fast wired charging support, 50W fast wireless charging support, and up to 10W reverse wireless charging. Finally, we’re told the phone will be powered by the Snapdragon 8 Gen 1 SoC, LPDDR5 RAM, UFS 3.1 flash storage, VC liquid cooling system, and stereo speakers tuned by Harman Kardon. The phone will be available in at least four colors: Green, Pink, Blue, and Black.

Over the last few days, Xiaomi has slowly been teasing key highlights of the Xiaomi 12 series (via XiaomiUI). So far the company has confirmed that the lineup will come with a new Surge P1 charging chip with up to 120 fast charging support, a 32MP front camera, and Sony IMX766 and IMX707 main sensors for the Xiaomi 12 and 12 Pro, respectively. The Xiaomi 12 series will also come with an AI-powered video recording feature called CyberFocus which the company says will continously track subjects no matter how they move and “will not lose focus.”

We expect to learn more about the Xiaomi 12 and Xiaomi 12 Pro, including their pricing and availability at tomorrow’s launch event. Besides the new phones, Xiaomi will also be detailng the latest  version of its custom skin: MIUI 13 as well MIUI 13 for Pad.

The post Xiaomi 12 design, features and specifications leaked ahead of the official launch appeared first on xda-developers.


from xda-developers https://ift.tt/3z0N5ny
via IFTTT

dimanche 26 décembre 2021

How to message unsaved WhatsApp numbers on Android

WhatsApp is one of the most widely used instant messaging services across the globe. Whether you’re texting a friend or creating a group chat with members of your family, WhatsApp is generally the preferred app since almost everyone uses it. Apart from texting known people, you may encounter several instances where you have to message certain unsaved phone numbers via WhatsApp. I’ve had instances where delivery executives from courier companies have asked me to share my GPS location on WhatsApp so that they can navigate to my house easily. In such scenarios, a quick hack to message unsaved numbers on WhatsApp comes in handy.

Ideally, I wouldn’t want to store someone’s number as a contact if I don’t know them personally or do not need to contact them more than once. Sharing my profile picture or status updates with a stranger is not really a wise thing to do, which is why we’re here to help you message unsaved phone numbers via your Android phone. Apart from privacy concerns, you might just be lazy to go through the entire process of adding a new contact just to send a single message or share your location. Here are some ways in which you can message unsaved phone numbers via WhatsApp on your Android device. These are quick and easy solutions that get the job done just fine. If you use an iPhone instead of an Android device, we have a  separate guide on how to message unsaved WhatsApp numbers on iOS.

How to Message Unsaved WhatsApp Numbers on Android via an App

The simplest and fastest way to send a message to an unsaved number is via an app from the Play Store. It’s called Click to Chat. It’s an extremely minimal and lightweight application whose only functionality is to help you send messages to unsaved numbers. Here’s how you can use it.

  • Download the Click to Chat app from the Play Store on your Android smartphone.
  • Open the app and you will be greeted with an overlay asking you to enter the phone number of the person you want to message via WhatsApp.

Click to Chat WhatsApp message unsaved numbers

  • Enter the desired phone number in the text field. you can either enter it manually or paste the phone number from the clipboard.
  • Make sure you also enter the relevant country code of the phone number you’re sending a message to.
  • Once you’ve entered the phone number, all you have to do is tap on Open. The app will start a conversation on WhatsApp with the entered number.

Click to chat [small, no ads] (Free, Google Play) →

How to Message Unsaved WhatsApp Numbers on Android via a Link

If you don’t want to install a third-party app to do the job, WhatsApp offers a direct way of messaging unsaved phone numbers via a link. While this is also quite simple, it just involves an additional step of entering the link in your web browser first. If you prefer this method since it’s directly affiliated to WhatsApp unlike a third-party app (which also uses an official API), here’s how you do it.

  • Open any web browser on your Android smartphone and enter the following URL in the address bar: https://ift.tt/32D33YM
  • Replace all the ‘X’s in the URL with the phone number you want to message. Note that the first two digits have to be the corresponding country code.
    • For example, if I want to message the number “1234567890” in India, my link would look like this: http://wa.me/911234567890 since +91 is India’s country code.

Message unsaved numbers on WhatsApp Android

  • Once you enter the link, hit Go. You will be redirected to a webpage with the option Continue to Chat.
  • Tap on it and you will be redirected to WhatsApp where you will now be able to message the phone number.

These were two easy ways in which you can message unsaved numbers on WhatsApp via your Android phone. There are several third-party apps that can do this, but Click to Chat is one that I’ve personally been using for a few years now and the reason I prefer it over others is that it’s light, ad-free, uses the official API, and works flawlessly. However, it’s not directly affiliated to WhatsApp in any way so if you don’t trust third-party apps, you might want to use the second method.

Messaging unsaved numbers is quite common and is a basic feature that WhatsApp needs to add natively to the app. Even after years of existence, there are some basic features that WhatsApp lacks and it’s amusing as to why they wouldn’t add them. Just like how multi-device support was added recently, we’re hoping WhatsApp would let users message unsaved numbers directly from the app shortly.

The post How to message unsaved WhatsApp numbers on Android appeared first on xda-developers.


from xda-developers https://ift.tt/3FtrbM1
via IFTTT

vendredi 24 décembre 2021

First 10 things to do with a new iPhone or iPad

Apple products are known for their durability, and they tend to be supported for years to come. The company has been manufacturing several models of its iPhone and iPad lineups to match almost all budgets and needs. If you don’t want to spend a fortune on an iDevice, you’re no longer limited to older, outdated models. Assuming you’ve recently bought or received one, you might be wondering what to do with it. Here are the first 10 things to do with a new iPhone or iPad.

Navigate this article:

  1. Move your data from another iDevice
  2. Secure it with a password
  3. Personalize your Home Screen to make it homelier
  4. Customize your Control Center
  5. Set up FaceTime and iMessage
  6. Enable Find My
  7. Disable WiFi Assist
  8. Draw a smile on your iPad’s face
  9. Make your iPad grow a limb or two
  10. Get a case — just in case
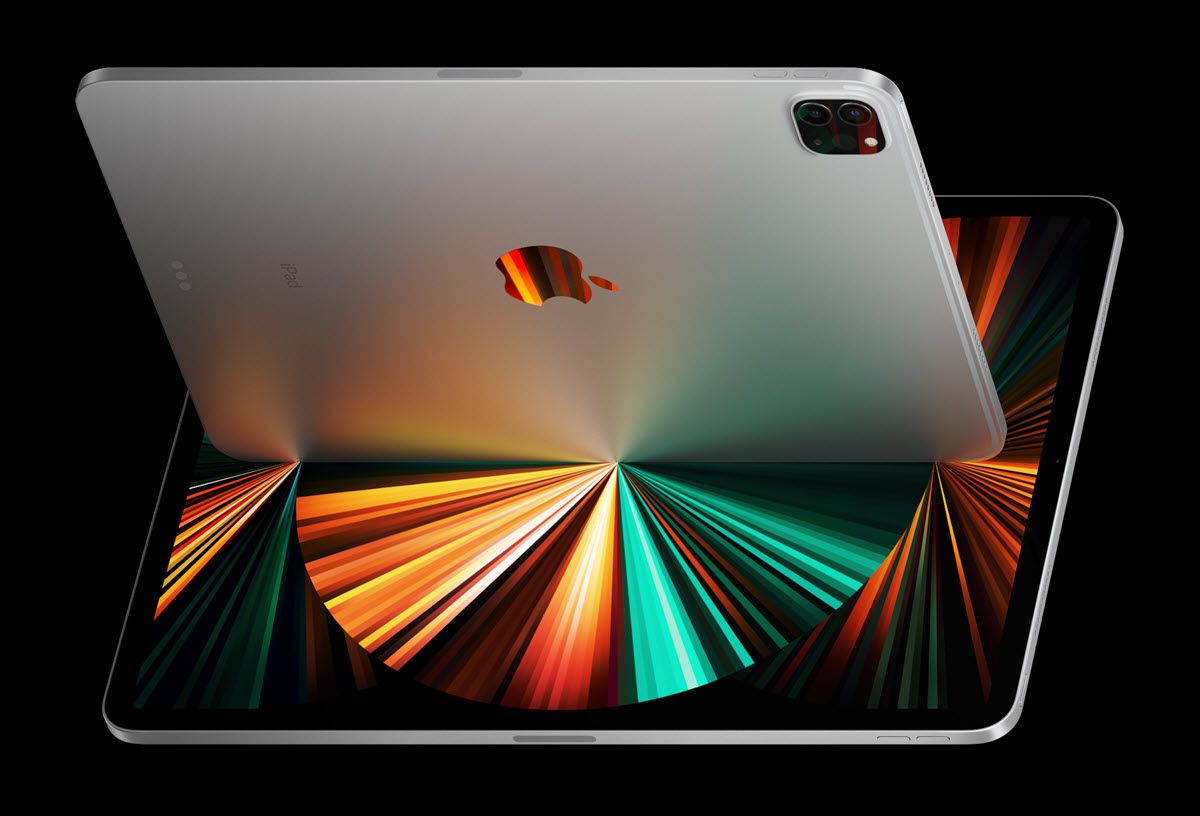
    Apple iPad Pro 2021 11-inch

    This 11-inch iPad is the latest Pro tablet from Apple. It is powered by the M1 chip and supports the Apple Pencil 2nd Gen.
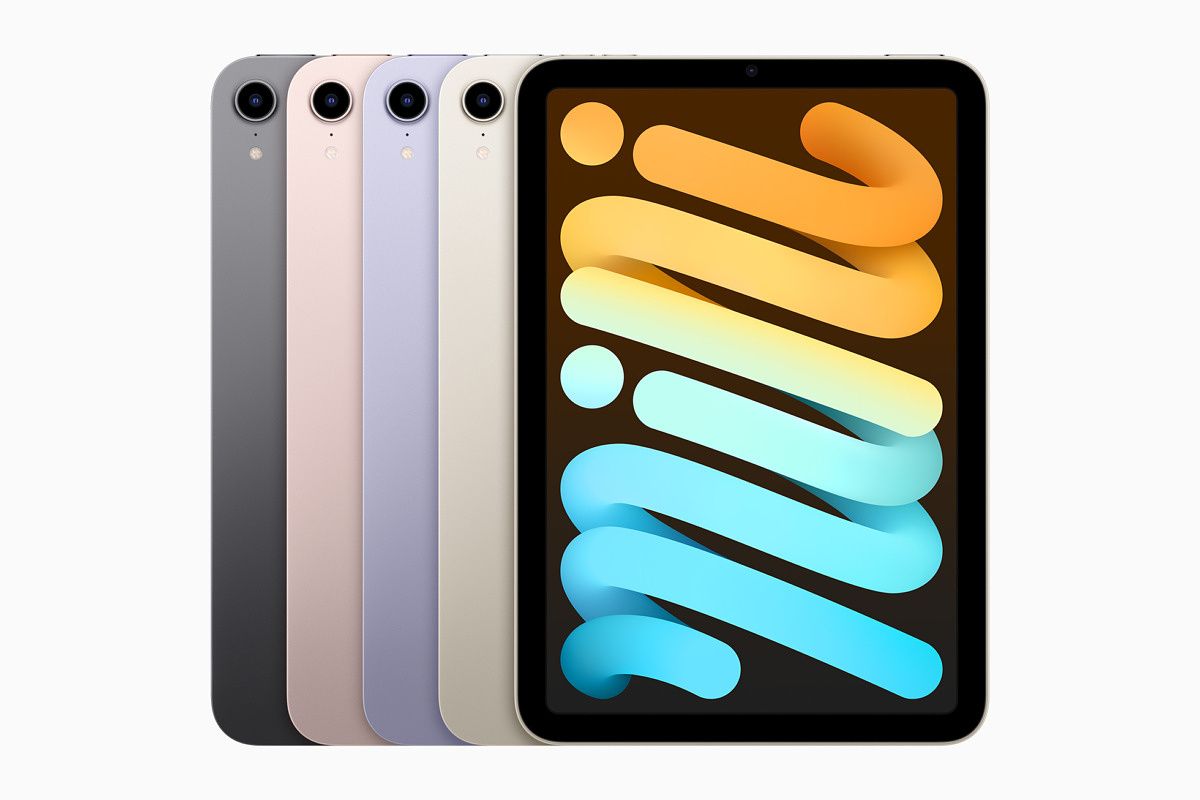
    Apple iPad Mini 6th Gen

    The iPad Mini 6th Gen is the latest compact iPad from Apple. It is powered by the A15 Bionic chip and supports the Apple Pencil 2nd Gen.
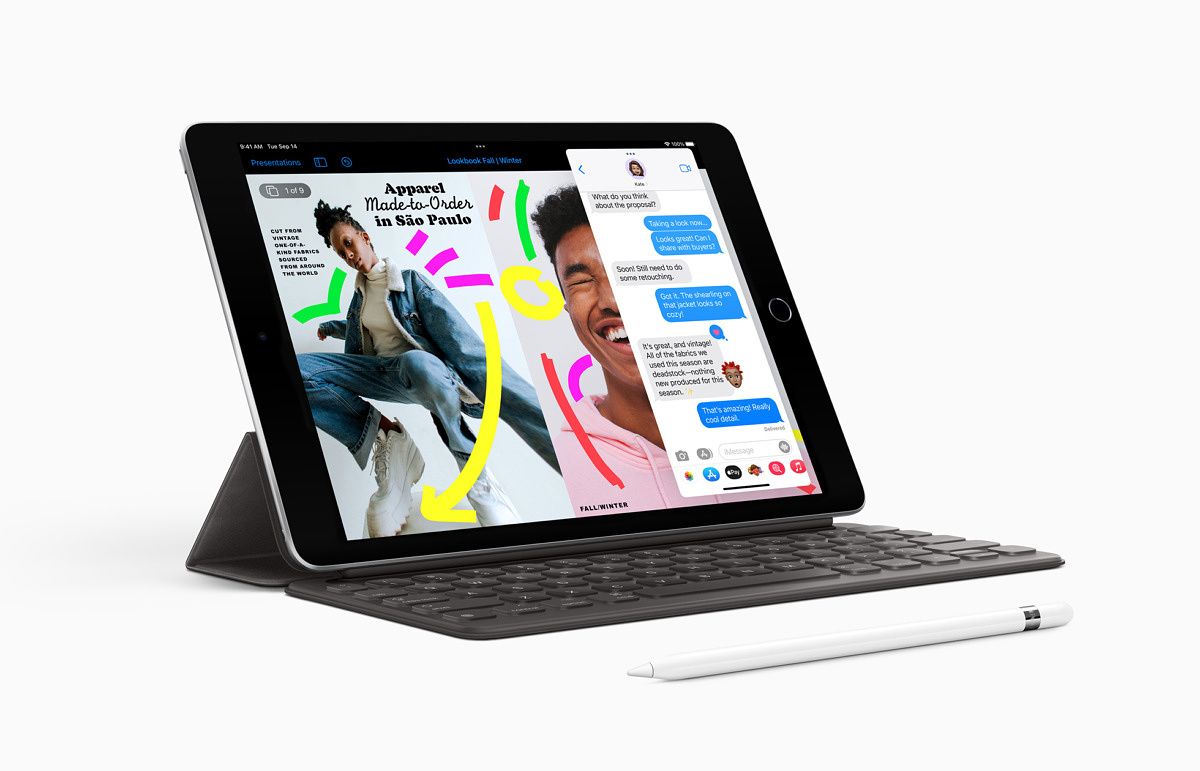
    Apple iPad 9th Gen

    The iPad 9th Gen is the latest affordable iPad from Apple. It is powered by the A13 Bionic chip and supports the Apple Pencil 1st Gen.

1. Move your data from another iDevice

quick start iphone

iPhones are known for their full backups and seamless data transfer process. When you back up an iPhone to iCloud or through a computer, it preserves all of the data. So restoring these backups on a wiped or new device will return everything to its previous state. What not all people know, though, is that you can restore an iPad backup on iPhone and vice versa. So if you already own an iPhone and have an iCloud backup of it, you can restore this backup on your new iPad. iPadOS will restore the common settings and data shared with iOS. And if you don’t have an iCloud backup, you can put your iDevices side by side to transfer the data.

2. Secure it with a password

Unlock Face ID iPhone with apple watch

Setting a password ensures your data is safe(r) if the iDevices end up in the wrong hands. It’s one of the first things you should do after getting a new iPhone or iPad. iOS and iPadOS prompt you to optionally choose one when you’re setting up a device. However, if you’ve already skipped this step, you can manually add one in the Settings app on your iDevice. Newer iPhone and iPad models support Face ID or Touch ID. This allows you to unlock your device and authenticate purchases without needing to enter your password every time.

3. Personalize your Home Screen to make it homelier

home screen widgets ipad

iOS 14 introduced Home Screen widgets on the iPhone. The feature didn’t make it to the iPad at the time — for some reason — and plenty of users were furious. Apple redeemed itself with the release of iPadOS 15 and ported this feature to the bigger screen. One thing you should do when you first get an iDevice is customize the Home Screen. This isn’t limited to changing the wallpaper only. Organize apps in a way that makes sense to you and take advantage of the numerous widgets to view information at a glance.

Both stock and third-party apps support the new widgets — if the developer has implemented them. The best part? They’re compatible with both portrait and landscape orientations on iPadOS. So when you rotate your iPad, your setup won’t get messed up. There’s more that Apple could do to make Home Screens better. But until then, go ahead and customize your new virtual home!

4. Customize your Control Center

control center options iOS

The Control Center on iOS and iPadOS has plenty of toggles that not all of us might find useful. Fortunately, Apple allows users to add, remove, and reorder these toggles. So you’re not stuck with the layout that is presented by default. One of the first things you should do when setting up a new iDevice is heading to the Settings app and changing them in the Control Center section. This enables you to choose between over one dozen options.

5. Set up FaceTime and iMessage

How to set an iMessage photo and name on your iPhone

FaceTime and iMessage access is one of the many reasons some users choose to buy Apple products. These privacy-focused communication tools will allow you to effortlessly reach your fellow iDevice-using friends and family members. Launch the Settings app, and scroll to the FaceTime and iMessage sections. There you will be able to choose your ID (what people see when you interact with them), such as your phone number or Apple ID email address. You can even set an iMessage profile photo and name.

6. Enable Find My

Find My iPhone iOS

Find My allows you to locate, erase, or control your iDevice remotely. With recent updates, this feature can work offline under certain conditions. So your device doesn’t need to be connected to WiFi or mobile data for it to work. And some newer iPhones support this feature even when they’re completely turned off! Enabling Find My is one of the first things you should do when getting a new iDevice. This ensures that you can still to some extent control it if it’s lost or stolen. Head to the Settings app > [Your Name] > Find My > Find My iPhone/iPad > and toggle all three settings on if they’re off.

7. Disable WiFi Assist

Cellular settings iOS

Plenty of us still subscribe to limited data plans and find our precious megabytes magically disappearing. iDevices have an option called WiFi Assist, and it’s enabled by default. What does this option do? It leaches on your mobile data when your WiFi connection is unstable or too slow. This is one of the first options I disable when I’m setting up an iDevice because it works stealthily.

Plenty of users aren’t aware of it, and I believe it should be off by default. At least it should notify users the first time it’s working for them to learn about its existence. Head to Cellular preferences in the Settings app and scroll towards the bottom, then disable this lil thief. Similarly, if you don’t want iCloud Drive to sync over mobile data, disable the option right below WiFi Assist.

8. Draw a smile on your iPad’s face

iPadOS 15 homescreen as it first appears after installing

iPadOS 15 homescreen with widgets being allowed anywhere.

An iPad can get lonely at times, and there’s no better way to make it happier than bringing it closer to its best friend. Whether you’re using a high-end iPad or an affordable one, there’s a pencil for it. The Cupertino giant currently sells two Apple Pencil models. Depending on your iPad’s Pencil compatibility, you can buy one to take advantage of even more features.

You can use this advanced stylus to turn your handwriting into typed text. Additionally — if you’re an illustrator — you can use it to precisely doodle your next masterpiece. The iPad display can detect pressure and change the stroke’s size depending on how hard you push. It’s the perfect companion for your new glass slab. You can buy both the 1st Gen and 2nd Gen models from Amazon. iPhones still don’t support Apple Pencils for the time being, so don’t buy one if you don’t own a compatible iPad.

9. Make your iPad grow a limb or two

It’s a shame that most of the newer iPads only have a port or two, especially since iPadOS supports external storages. The good news is that you can buy dongles and accessories to make your Apple tablet more adaptable and versatile. The not-very-good news is that you have to buy them separately. This page lists the official additions you can get for your iPad to make it even more capable.

10. Get a case — just in case

The Magic Keyboard for the iPad Pro 2021.

iDevices are delicate — accidentally drop them (heaven forbid) and they’re shattered to a million pieces. Buying your shiny glass slab a case would be a very wise decision. Scratches and cracks will only make it look worn out and not as premium. You don’t have to limit to yourself to regular cases if you have an iPad, for some of them come with keyboards if those better match your needs. To make the selection process easier, we have compiled for you several lists with various iPhone and iPad models and case types to choose from.


iPhones and iPads are great devices for everyday needs. Whether you’re looking for entertainment, productivity, online socializing, or a mix of everything — an iDevice will provide you with a solid experience that you won’t regret. Once you’ve set up your device, explore its capabilities and additional features. And don’t forget to install your favorite apps!

Which iDevice model do you own? Let us know in the comments section below.

The post First 10 things to do with a new iPhone or iPad appeared first on xda-developers.


from xda-developers https://ift.tt/3FyCqmM
via IFTTT

First 10 things to do with a new Samsung Galaxy Phone

Bought yourself a shiny new Samsung Galaxy phone? You might need some help familiarizing yourself with the interface or a few tips that will help you make the best out of your new purchase. That’s exactly what you’re going to find in this article! Whether you’re new to Samsung’s phones or just upgrading from an older model, we’ll tell you the first 10 things you should do with a new Galaxy phone to ensure you have the best experience. So, grab your phone, sit back, and follow these simple steps to customize the device to its full potential!

Navigate this article:

  1. Disable Ads/Promotions during Setup Process
  2. Transfer Data from your old phone
  3. Customize your Homescreen
  4. Setup Secure Folder for Sensitive Data
  5. Remap the Bixby Button
  6. Set up Always on Display
  7. Use Dual Apps for Messengers
  8. Improve Multitasking with Edge Panels
  9. Extend Battery Life with Power Saving Modes
  10. Customize every single aspect with Good Lock!
    Samsung Galaxy A52 5G

    Best mid-range Samsung phone

    The Galaxy A52 5G is a capable mid-range smartphone from Samsung that covers all basics. If you're looking for a reliable phone without breaking the bank, this is the one you should consider.
    Samsung Galaxy Z Flip 3

    Best foldable for most people

    The Galaxy Z Flip 3 is the most affordable foldable phone that doesn't make a lot of compromises. It has the latest chip, a unique design, and even includes an IP rating this year. It's a head-turner for sure!
    Samsung Galaxy S21 Ultra

    The ultimate flagship phone

    This is the best smartphone that you can get from Samsung that covers all bases. It's got solid performance, the most versatile set of cameras, and a gorgeous display. This one's the do-it-all.

1. Disable Ads/Promotions during Setup Process

The first thing you do when you get a new phone, apart from inserting your SIM card into it, of course, is going through the initial setup process. This is quite straightforward as the instructions are displayed on the screen as you navigate through the entire process. However, there are a few options during setup, that if selected, may not result in an ideal experience while using the phone.

For example, Samsung is known to display ads and send promotional notifications on some of its phones. This can be avoided by deselecting any such options that ask for your permission to display promotional content. It’s easy to overlook such checkboxes while setting up the phone, but the rule of thumb is don’t blindly agree to and select every option shown to you on the screen. Make sure you read the options on the screen thoroughly and select only the ones that are absolutely essential to use the phone.

Setup Process on OneUI 4.0

While setting up your Samsung account, you will be asked to agree to various terms and conditions, some of which are mandatory, while the others are optional. The Terms and Conditions, Special terms, and Samsung account Privacy Notice have to be ticked compulsorily for you to proceed further. Select these options only. Do not select the ‘I have read and agree to all of the above’ option.

Samsung phone setup process Recommended apps Samsung apps

Once you enter your details, you will see a screen that says Review additional apps. Uncheck the All of the following apps checkbox and select only the apps that are important to you. If you don’t use any of the apps listed, you can skip through this step entirely. Samsung will also ask you to Get recommended apps which are essentially Samsung’s first-party apps, and we could see no way to skip this.

Setup Process on One UI 3.0 and earlier

Agreeing to the End User License Agreement and Privacy Policy are absolutely essential without which you won’t be able to use the device. However, Sending of Diagnostic Data, Information Linking, and Receipt of Marketing Info are optional and we urge you to uncheck these checkboxes, especially the last one. Generally, users tend to select the Agree to all the above option amidst the excitement to use the phone. You shouldn’t be doing that. Some budget and mid-range Samsung phones also come with a Lock Screen Stories option that displays unwanted content on the lockscreen. Disable it if you see the option during setup. If you see any other option that has Allow Recommendations… in it, it’s wise to uncheck it.

Screenshot of Samsung services screen Screenshot of the options to select on Samsung services screen Screenshot of Samsung services screen Screenshot of app recommendations being pushed to the user

Another thing to note while setting up the phone is to not install any unnecessary app from the Recommended apps list. Samsung will try and push you to install apps they’ve partnered with, but it’s best to deselect the ones you don’t need or use. You can install specific apps that you need later on via the Play Store, or restore a backup/transfer data from an older phone which would restore all the apps you use.

2.  Transfer Data from your old phone, including an iPhone!

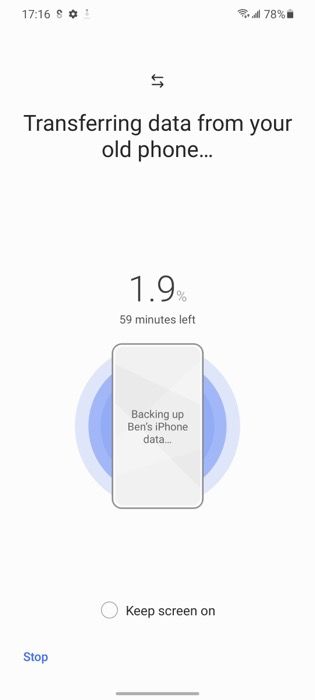
Samsung gives you a nice option to migrate your data from an older phone to your new Galaxy phone. It’s called Samsung Smart Switch and the option to use it is presented to you while setting up your new Samsung device. What’s cool is that by using this process, you can transfer all your existing data from your old smartphone to your new device. This includes apps, messages, photos, videos, etc. The best part is that Smart Switch even lets you transfer your data from an iPhone to your new Galaxy phone.

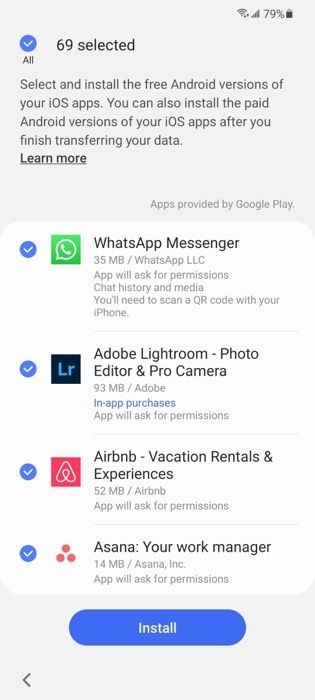
Cable connection whatsapp migration from ios to android Transfer process on Smart Switch Whatsapp installation on Android

If you’ve switched over from iOS to Android since it’s clearly the better smartphone OS (sorry, Mahmoud), you will be able to install the same set of apps on your new phone that you previously used on your iPhone. In fact, you can now transfer WhatsApp chats from iOS to Android if you have a Samsung Galaxy phone, and we recommend you do this early on as the process works only if your phone is in a brand new state. If you don’t have your older phone with you because you traded it in for a new one, you can even restore a backup from your old phone alternatively.

3. Customize your Homescreen

Alright, you’ve set up the phone and you’re into the UI. Now what? Well, the beauty of Android is that you can customize various aspects of your phone to no limits. While some customizations require additional apps like launchers or mods for power users, you get a ton of options in-built especially on Samsung devices. The homescreen of your device is what you interact with when you first unlock your device, so it’s a good idea to customize it as per your liking.

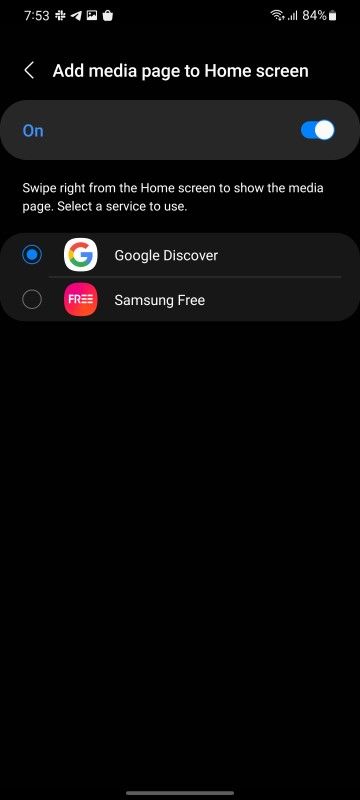
Homescreen screenshot Homescreen customization screenshot Minus 1 page options Homescreen customization screenshot Homescreen customization screenshot Minus 1 page options

You can change the wallpaper, add widgets, try a different icon pack, or even change the grid size on the homescreen. To do this, tap and hold an empty area on your homescreen to bring up the homescreen menu. Now, tap on Home screen settings. Here, you can choose the homescreen grid size, enable/disable notification badges on apps, and even hide your apps from the app drawer.

By default, Samsung also displays a Bixby pane to the right of the homescreen on some devices. You can disable this by holding an empty area on your homescreen to bring up the homescreen customization menu. Now, you’ll see all your homescreens as scrollable windows. Scroll to the left-most window which is Bixby home. You’ll find a toggle about it which you need to disable.

4. Setup Secure Folder for Sensitive Data

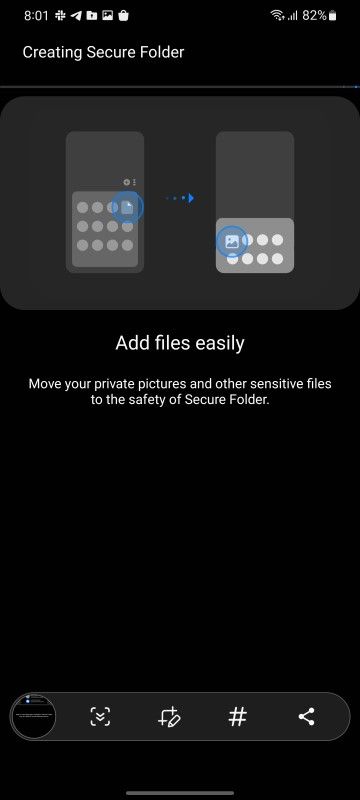
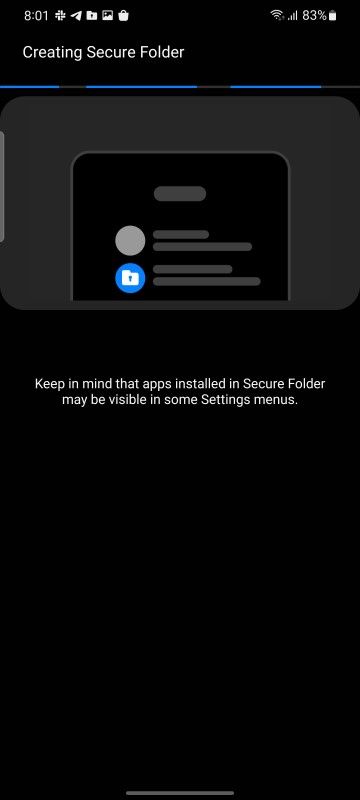
This is a feature that’s quite underrated on Samsung Galaxy phones. Samsung devices have Knox security and a part of that is something known as Secure Folder. Enabling the option basically creates a folder on your phone that is encrypted with a PIN or pattern that’s different from the one used to unlock your phone. Once you create a Secure Folder, you can store sensitive information and data like photos, account numbers, documents, in it.

Several people store their credit card numbers, PINs, etc. on their smartphones. While that’s not a good practice, Secure Folder just adds an additional layer of security for such information. Even if someone else manages to get into your phone, they will also have to get through the additional security of the Secure Folder to access your personal information. Note that Secure Folder is present only on some Galaxy phones, mainly mid-range and flagship phones. If you have a budget-oriented Samsung device, chances are that you may not have this feature.
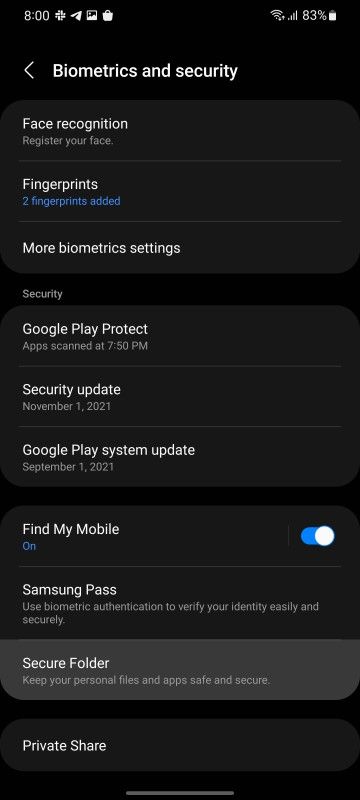
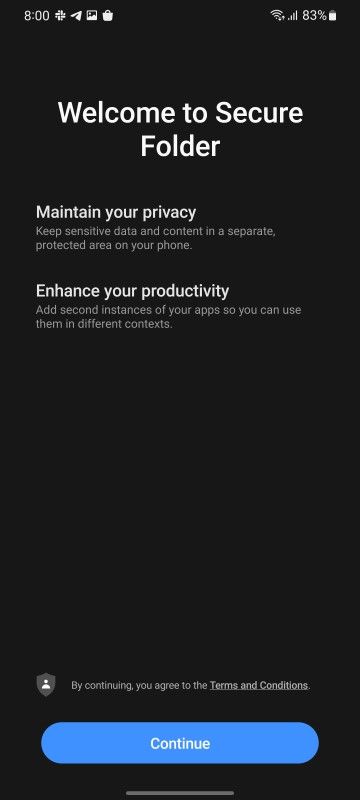
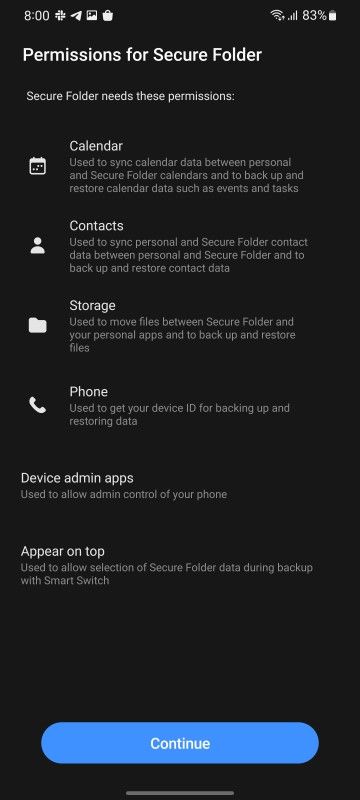
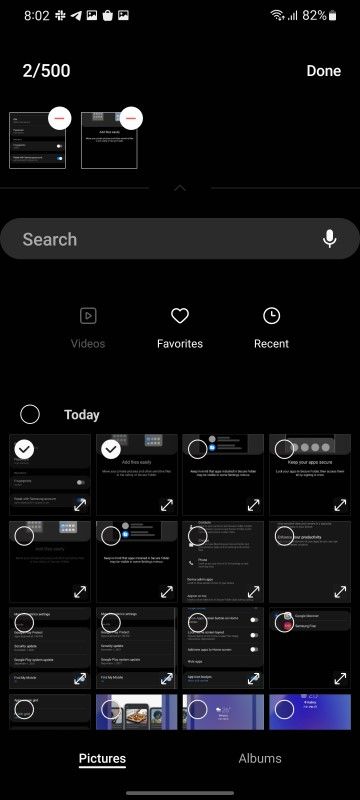
Screenshot showing Secure Folder setup and options Screenshot showing Secure Folder setup and options Screenshot showing Secure Folder setup and options Screenshot showing Secure Folder setup and options Screenshot showing Secure Folder setup and options Screenshot showing Secure Folder setup and options Screenshot showing Secure Folder setup and options Screenshot showing Secure Folder setup and options

If you wish to set up the Secure Folder feature on your phone, head over to Settings > Biometrics and Security > Secure Folder. You will be prompted to sign in with your Samsung account now if you hadn’t done it already. Once done, you can enter the password to access Secure Folder followed by setting up a biometric way to access it like your fingerprint. Once this is set up, you can add files or whatever you want into the Secure Folder. If you wish to move existing files or photos to the Secure Folder, go to the Gallery app, long-press on the item you wish to move, and select the Move to Secure Folder option.

To access Secure Folder, you can either tap on the icon in your app drawer or the quick toggle in the notification center.

5. Remap the Bixby Button

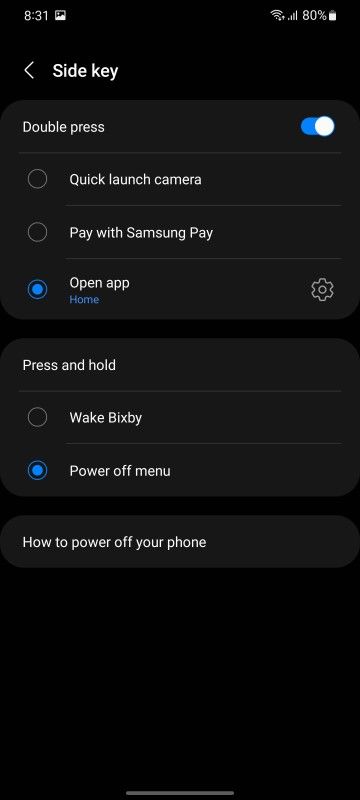
By default, the key on the side of your Galaxy phone is used to turn the screen on/off with a single press. While that functionality cannot be changed, you can customize the long-press and double-press functionality of the key. To do this, head over to Settings > Advanced Features > Side Key. Here, you can select what function you want to assign to the power button when you double-press it or press and hold it.

Settings menu screenshot on Samsung Advanced Settings menu screenshot on Samsung Bixby button Settings menu screenshot on Samsung

I like keeping my double-press setting to launch the camera app. It’s a nifty little shortcut for when you want to open the camera app quickly and don’t have the time to unlock the device, get to the homescreen, and then launch the app. The press and hold option is set to Wake Bixby by default which can get rather inconvenient if you don’t use Samsung’s assistant. You can change the Press and hold option to trigger the Power off menu like how it used to be conventionally on all phones a few years back. This way, pressing and holding the power button will enable the power off and reboot options instead of triggering Bixby.

6. Set up Always on Display

If your Samsung phone comes with an AMOLED display, there’s a good chance it has Always on display functionality. If you’re not familiar with the feature, Always on display is literally what the name says — it keeps your display always on to show you important information like the time, date, calendar events, pending notifications, etc. It’s pretty useful if you don’t want to constantly turn on the screen of your smartphone to check the time or notifications and end up using the phone for a lot of time.

Samsung Settings Samsung Always On Display Samsung Always On Display Settings

To enable Always on display on your Galaxy phone, head over to Settings > Lock Screen > Always on Display. Here, you can choose whether you want it to show up for 10 seconds or let it remain on all the time. I prefer the latter. You can also choose the clock type and what information you want to be displayed. Once you start using this feature, you just cannot live without it.

7. Use Dual Apps for Messengers

Samsung has added a nifty feature in One UI that lets you create a cloned version of an app and use two versions of the same app on your phone. If you have two SIM cards and you want to use two WhatsApp accounts or two versions of Facebook Messenger for two different accounts, you will be able to do it natively by following a few simple steps.

Dual App setting on Samsung One UI Dual App setting on Samsung One UI

Head over to Settings > Advanced Features > Dual Messenger. Here, you’ll see the list of apps installed on your device that can be duplicated into a secondary app. Select the apps that you want a secondary version for and tap Install. Wait till the process is done, and you now have two versions of the same app. A secondary version of the same app is denoted by a small orange banner on the bottom right corner of the app icon on the homescreen as well as the app drawer. You can use that to differentiate between the two apps.

To disable the second version of an app, head over to the same menu and turn the toggle off next to the app.

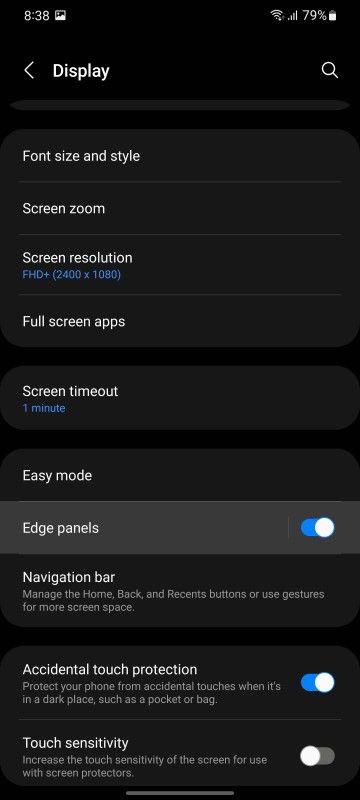
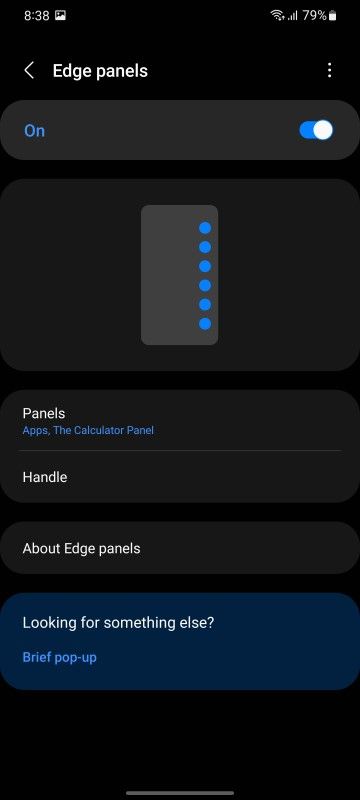
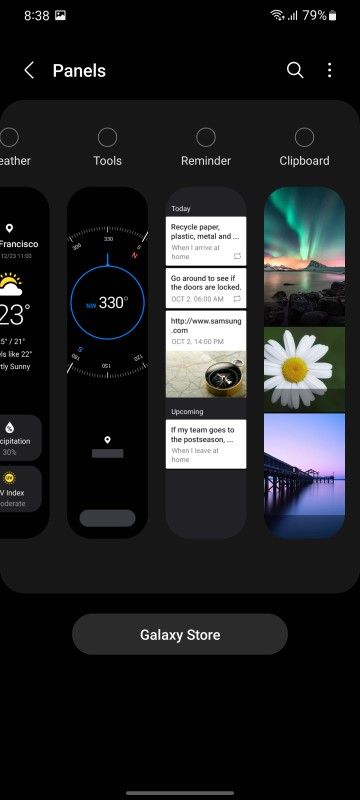
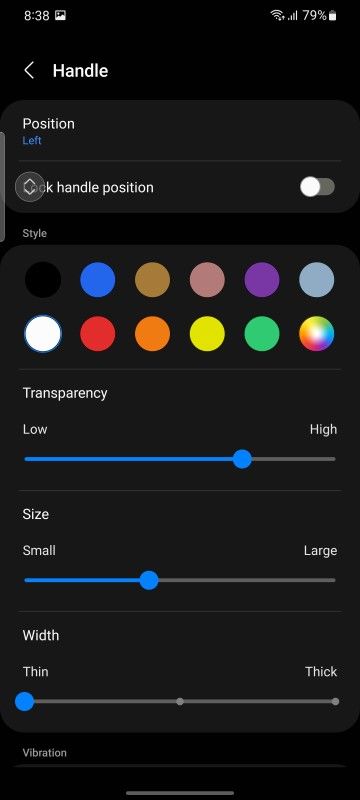
8. Improve Multitasking with Edge Panels

The Edge panel was first introduced to add extra functionality to the curved edges on Samsung flagships. Since then, it has made its way to several Samsung phones and is a great tool if you multitask a lot on your phone. It’s a small translucent bar that rests on the edge of your display. Tapping on the bar reveals several options like quick shortcuts, various screenshot methods, favorite contacts, media controls, clipboard, etc. You can even set up app pairs in the Edge Panel for your favorite set of apps that you use together. Tappin on an app pair will open the two apps simultaneously in split-screen view making it easier for you to multitask.

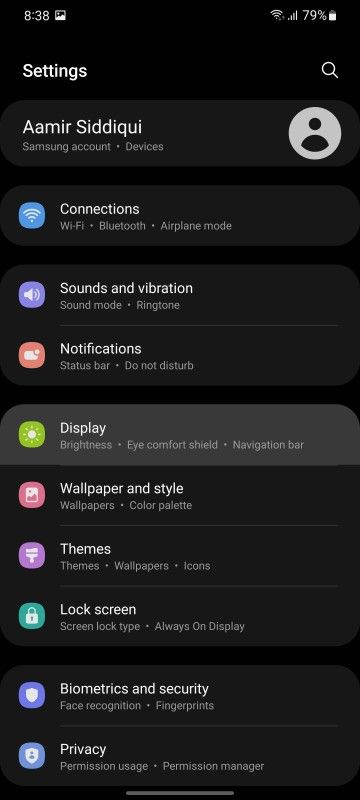
Edge Panels on Samsung One UI Edge Panels on Samsung One UI Edge Panels on Samsung One UI Edge Panels on Samsung One UI Edge Panels on Samsung One UI Edge Panels on Samsung One UI Edge Panels on Samsung One UI Edge Panels on Samsung One UI

To activate and use Edge Panel, head over to Settings > Display > Edge Screen and enable the toggle next to Edge Panels. You can now tap on the small portion of the screen on the edge to activate Edge Panel on top of any app that you’re in. From here, you can also customize the Edge Panel to include all the features and options that are important to you. Note that Edge Panel is only available on certain Samsung phones and not on all devices.

9. Extend Battery Life with Power Saving Modes

Most smartphones these days come with good battery life and last throughout the day if not longer. However, you may face certain situations where you would want to extend the battery life of your Samsung Galaxy phone further. If you know you’re going to be away from the charger for a long time, you might want to save up some juice for emergency situations. That’s where the various power-saving modes on One UI come into the picture.

Samsung phones come with three different battery modes — Normal, Mid power-saving, and Max power-saving. Depending on the situation, you can switch between these modes.

The Normal mode is for when you want your phone to perform the best with all the available features. It makes the best use of all the resources and enables the fastest performance. Essentially, this is the mode with Power Saving Off or disabled. For regular use, this is the mode your phone should be on at all times.

Battery Saver on One UI 4.0

On One UI 4.0, Samsung has made a few changes to the battery saver. Instead of various modes, they have included a single option with a toggle to disable other functionalities that may not be vital during a battery emergency. To access the battery saver on a phone with One UI 4.0, head over to Settings > Device care > Battery > Power saving.

Here, you’ll find a master toggle to enable power saving mode. This will enable a moderate or mid-level power-saving where all your apps and services will be available to use. You will also be able to connect to the internet and connect to other wireless peripherals. Your CPU performance, however, will be throttled to save some extra power and all background activities will be paused. Other aspects like display brightness and refresh rate will also be reduced.

Samsung Settings Device care Battery settings Power saver on Samsung

If you want the ultimate power saving mode to kick in, you will have to toggle the Limit apps and Home screen option in this menu. This is essentially the MAX power saver that was present in One UI 3.0 and below. You can read the description below to know what the Max power saver does but, in short, it limits your phone to the absolute basic functionality which is making/receiving calls, sending text messages, etc. It even replaces your homescreen with a black wallpaper. This is your last hope when your phone is on the verge of switching off.

Battery Saver on One UI 3.0 and below

Mid Power Saving mode is for when you want to extend your battery life by a bit without affecting the core functionality of your phone. This mode will still let you use all your apps and networks but will limit background usage, tone down your screen refresh rate and resolution, limit display brightness, and disable Always-On display to extend battery life. Use this mode for when you know you’re only a few hours away from a charger so you want your phone to last just an extra bit longer.

Max Power Saving mode is the ultimate rescue tool for when you’re in dire need of battery life and your phone is on its last legs. This mode essentially disables all the functions of your phone that aren’t absolutely necessary and limits it to a set of 8 apps that you can choose from. You can configure apps like dialer, messages, browser, etc. and those will be the only apps you will be able to use when you’re in Max power Saving mode. Things like internet connectivity and Bluetooth will also be limited and your wallpaper will be changed to a black background. If you want to extend your battery life by a big margin and want your phone to stay alive for basic functionality like making and receiving calls, use this mode.

To access the various power-saving modes, head over to Settings > Device Management > Battery and select the desired mode.

10. Customize every single aspect with Good Lock!

I saved the best for the last! Good Lock is an app that can be downloaded via the Galaxy App Store. You can customize every single aspect of your Samsung Galaxy phone with Good Lock. From the notification center to recent apps, the lockscreen to the navigation bar, the app has got it all. First, head over to the Galaxy App Store and download Good Lock on your Samsung phone. Then, open the app to find all the various customization modules that serve different purposes.

Samsung good lock customization Samsung Good Lock

There’s NotiStar for notifications, LockStar for the lockscreen, Multistar for multi-window and multitasking, NavStar for the navigation keys, and a bunch of other customization options that you can use to completely change the way your phone looks! If you have a foldable from Samsung and struggle with the weird aspect ratio in some apps, Good Lock even has a module to change per-app aspect ratios to fit the screen.

The possibilities are endless with Good Lock. I urge you to install the app and spend a good amount of time going through all the various modifications you can make. You surely won’t be disappointed!


So, what are you waiting for? Grab your brand new Samsung Galaxy phone and get to work! Customize the device to make it your own and follow all the simple tricks to get the best out of your device. Which of these tips did you like the best? Let us know in the comments below!

The post First 10 things to do with a new Samsung Galaxy Phone appeared first on xda-developers.


from xda-developers https://ift.tt/3yXZhFu
via IFTTT